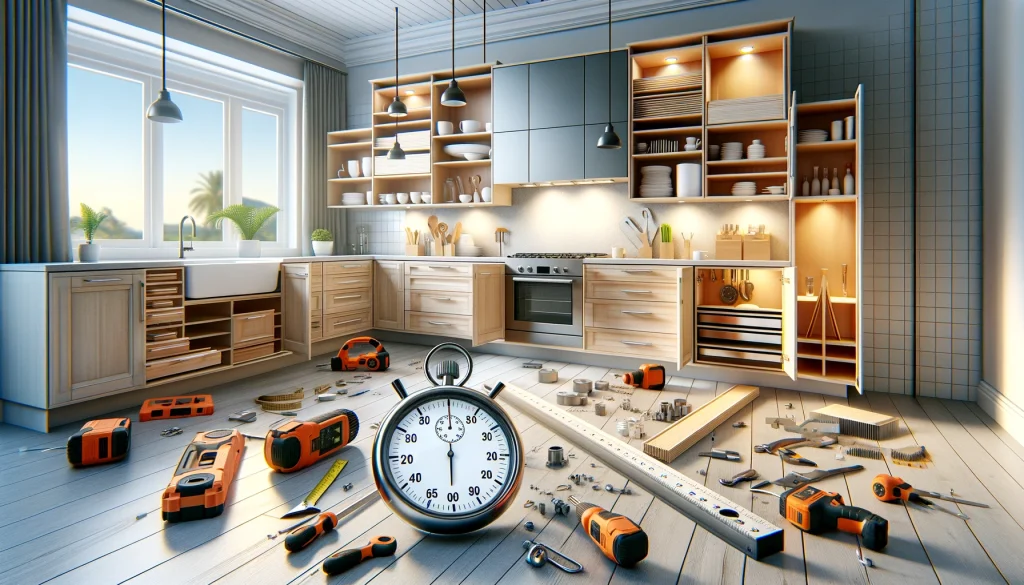
It generally takes around 2-4 days to paint kitchen cabinets. Painting kitchen cabinets can give your kitchen a fresh and updated look, without the need for a full renovation.
However, it is important to understand that painting cabinets is a time-consuming process that requires proper preparation and attention to detail. The time it takes to paint kitchen cabinets can vary depending on factors such as the size of the kitchen, the number of cabinets, and your experience level.
In general, it typically takes around 2-4 days to complete the painting process. This includes time for cleaning, sanding, priming, painting, and allowing the paint to dry properly between coats. It is important to be patient and follow the proper steps to achieve a professional-looking finish that will last for years to come.

Factors Affecting Time Required
When it comes to painting kitchen cabinets, several factors can influence the time it takes to complete the project. Understanding these factors will help you plan accordingly and ensure a smooth and efficient painting process. Here are the key factors that can affect the time required:
Size Of The Kitchen
The size of your kitchen plays a vital role in determining the time needed to paint the cabinets. Larger kitchens with more cabinets will obviously take longer to complete compared to smaller ones. Additionally, the layout and design of the kitchen can also affect the painting process. Kitchens with intricate cabinet designs, multiple shelves, and hard-to-reach corners may require more time and attention.
Condition Of The Cabinets
The condition of your cabinets is another crucial factor that influences the time required for painting. If your cabinets are in good condition and require minimal preparation, such as cleaning and sanding, the painting process will be quicker.
However, if your cabinets have extensive damage, like dents, cracks, or peeling paint, they will require more prep work, which can significantly increase the time needed for the project.
Preparation Process
The preparation process is a crucial step in painting kitchen cabinets. Properly preparing the cabinets can ensure a smooth and long-lasting finish. Here are the three important steps in the preparation process:
Removing Cabinet Doors And Hardware
Before you start painting, it’s important to remove the cabinet doors and hardware. This step allows for better access and ease of painting the cabinets. You can use a screwdriver or a drill to remove the hardware.
Place the hardware in a zip-lock bag and label it to avoid confusion when reassembling the cabinets later. By removing the doors and hardware, you can also prevent any accidental paint splatters or drips on them.
Cleaning And Sanding The Surfaces
Once the cabinet doors and hardware are removed, it’s time to clean and sand the surfaces. Start by cleaning the cabinets thoroughly with a gentle cleaner to remove any grease, dirt, or grime. This step is essential as it ensures the paint adheres properly to the surfaces.
After cleaning, use a fine-grit sandpaper to lightly sand the cabinet surfaces. Sanding helps in providing a rougher surface for the paint to stick to, ensuring better adhesion and a smoother finish. Remember to wipe off any dust or debris after sanding.
Priming The Surfaces
After cleaning and sanding, the next step is to prime the cabinet surfaces. Applying a primer creates a solid base for the paint and helps it adhere better, ensuring a more durable finish. Use a brush or a roller to apply a thin, even coat of primer to the cabinet surfaces. Allow the primer to dry completely before moving on to the painting process.
Choosing The Right Paint And Tools
Choosing the right paint and tools is crucial when embarking on a kitchen cabinet painting project. The quality of the paint and the tools used can significantly impact the final result and the durability of the finish. From selecting the appropriate paint type to having the essential painting equipment, every step in this process is essential to achieving a professional-looking outcome.
Selecting The Appropriate Paint Type
When choosing the paint for your kitchen cabinets, consider the material of the cabinets and the desired look you want to achieve. Latex paint is a popular choice for its durability and easy cleanup, while alkyd paint offers a smooth, high-quality finish. Chalk paint provides a trendy, matte look, and acrylic paint can create a sleek, modern finish. Opt for a low-VOC paint to minimize harmful fumes.
Essential Painting Equipment
Having the right painting equipment is essential for achieving a professional result. Ensure you have the following tools and supplies on hand:
- High-quality paint brushes and rollers
- Sandpaper and a sanding block
- Painter’s tape for precise edges
- Primer suitable for the chosen paint type
- Drop cloths to protect the surrounding area
Application Techniques
Master application techniques for optimal results. Learn proper methods, tools, and tips to excel in various fields. From makeup to software development, enhance your skills for success.
Using Primer Effectively
Primer creates a smooth surface. Apply primer evenly. Allow primer to dry.
Paint Application Methods
- Brush: Use a quality brush for precision.
- Spray: Spraying gives a smooth finish.
- Roller: Rollers are efficient for large areas.
Drying And Curing Time
When painting kitchen cabinets, understanding the drying and curing time is crucial for achieving the best results. Properly managing these processes ensures a durable and long-lasting finish.
Factors Affecting Drying Time
- Type of Paint Used: Different types of paints have varying drying times.
- Humidity level: High humidity can prolong drying time.
- Ventilation: Proper ventilation speeds up the drying process.
Ensuring Proper Curing
- Allow Sufficient Time: Make sure to allow adequate time for the paint to cure fully.
- Avoid Heavy Use: Refrain from heavy usage of cabinets until the paint is fully cured.
- Temperature Control: Maintain a consistent temperature for optimal curing.
By considering these factors and ensuring proper curing, you can achieve beautifully painted kitchen cabinets that will stand the test of time.
Reassembly And Finishing Touches
Once the painting process is complete, the final step in refreshing your kitchen cabinets is reassembling them and adding those finishing touches. This is the stage where the cabinets truly start to come together, and the transformation becomes evident. Let’s take a closer look at the crucial steps involved in reattaching the doors and hardware, as well as performing the final touch-up and inspection.
Attaching Doors And Hardware
After the paint has dried thoroughly, it’s time to reattach the cabinet doors and hardware. This step requires precision and attention to detail to ensure the doors are aligned correctly and the hardware is securely fastened. Here are the steps to follow:
- Check that the paint has completely dried to avoid any smudges or damage during reassembly.
- Use a screwdriver or drill to reattach the hinges to the cabinet doors, making sure they are properly aligned and level.
- Once the doors are back in place, carefully reinstall the knobs or handles, ensuring they are firmly affixed.
Final Touch-up And Inspection
With the doors and hardware reinstalled, the next crucial step is to perform the final touch-up and inspection to ensure a flawless finish. Here’s what you need to do:
- Inspect the cabinets for any imperfections in the paint, such as drips or streaks, and touch up these areas as needed.
- Check for any missed spots or uneven coverage, and apply an additional coat of paint if necessary to achieve a uniform finish.
- Examine the doors and hardware for any gaps or misalignment, making any necessary adjustments for a seamless look.
Common Mistakes To Avoid
When it comes to painting kitchen cabinets, taking shortcuts or rushing the process can lead to disappointing results. Avoiding these common mistakes is crucial to achieving a professional, long-lasting finish. Here are two key errors to steer clear of:
Skip Proper Prep Work
One of the biggest mistakes people make when painting kitchen cabinets is skimping on the prep work. It may be tempting to start painting right away, but taking the time to properly prepare the cabinets will make a world of difference in the final result.
First and foremost, make sure to thoroughly clean the surfaces of the cabinets. Remove any grease, dust, or dirt using a gentle cleanser and warm water. Allow the cabinets to dry completely before moving on to the next step.
Next, it’s essential to sand the cabinets to create a smooth and even surface for the paint to adhere to. Use a fine-grit sandpaper and gently sand the entire cabinet, including the doors, drawers, and frames. Be sure to remove any loose or peeling paint as well.
After sanding, it’s time to prime the cabinets. Applying a high-quality primer will prevent the paint from discoloring and help it adhere better. Choose a primer specifically designed for use on kitchen cabinets and follow the manufacturer’s instructions for application and drying time.
Skipping any of these essential prep steps can result in paint that doesn’t stick properly, leading to chipping, peeling, or a less-than-ideal finish. Remember, proper prep work is the foundation for a successful paint job.
Rush The Painting Process
Another mistake to avoid when painting kitchen cabinets is rushing through the process. While it may be tempting to get the job done quickly, taking your time and following the proper order of steps is crucial for achieving a professional-looking outcome.
Start by removing all cabinet hardware, such as handles and hinges. This will allow you to paint the entire surface evenly without any obstructions. Keep the hardware organized and labeled to make reinstallation easier later.
When it comes to applying the paint, use smooth and even strokes, working from top to bottom. Take your time, ensuring that each coat of paint is fully dry before applying the next. This will help prevent streaks, drips, or uneven coverage.
Give the cabinets ample time to dry between coats and before reinstalling any hardware. Rushing this drying process can lead to damaged paint or hardware that sticks to the paint, ruining your hard work.
By avoiding these common mistakes, you’ll be well on your way to beautifully painted kitchen cabinets that will stand the test of time.
The Ultimate Guide to the 10 Best Gas Cooktops for Your Kitchen
Expert Tips And Tricks
If you’re considering a kitchen cabinet painting project, one of the most common questions on your mind would be: “How long will it take?” While the exact time can vary depending on factors like cabinet size, condition, and your DIY skill level, there are expert tips and tricks that can help you streamline the process and complete the task efficiently.
Utilizing Paint Sprayers
Painting kitchen cabinets with a brush can be time-consuming and leave streaks or brush marks behind. But by utilizing a paint sprayer, you can achieve a smooth and professional finish in a fraction of the time. Paint sprayers allow for quick and even coverage, reducing the need for multiple coats.
Here are some key tips for using paint sprayers:
- Prepare the surface: Clean and sand the cabinets properly before painting to ensure a smooth finish.
- Practice on a test surface: Before spraying the cabinets, practice on a cardboard or scrap wood to get comfortable with the sprayer’s settings and spraying technique.
- Use an even motion: Hold the sprayer about 8-12 inches away from the cabinet doors and drawers, moving in a steady horizontal or vertical motion. Avoid spraying too close or too far from the surface.
- Overlap strokes: Overlap each stroke slightly to ensure even coverage and prevent any gaps or streaks.
- Allow proper drying time: Follow the manufacturer’s instructions for drying time between coats to achieve the best results.
Optimizing Workflows For Efficiency
When it comes to painting kitchen cabinets, optimizing your workflow can significantly reduce the time it takes to complete the project. By following these expert tips, you can increase your efficiency:
- Organize and prep: Remove all cabinet hardware, label each piece for easy reinstallation, and create a designated workspace to streamline the process.
- Plan ahead: Create a step-by-step plan and determine the best order to paint the cabinets, starting from the inside and moving outward.
- Batch work: Instead of paint individual cabinets, consider painting multiple doors and drawers at once. This reduces the setup time for each piece and allows for continuous workflow.
- Delegate and rotate: If you have a team working on the project, delegate tasks to different individuals and rotate between painting, sanding, and other prep work.
- Stay organized: Keep track of painted and unpainted cabinets to avoid confusion and ensure consistent progress.
By implementing these expert tips and tricks, you can significantly reduce the amount of time it takes to paint kitchen cabinets. Whether you’re using a paint sprayer or optimizing your workflow for efficiency, these strategies will help you achieve a beautiful and professional-looking finish without spending weeks on the project.
How Long Does It Take to Install Kitchen Cabinets
Installing kitchen cabinets can vary in time depending on factors like the size of the kitchen, complexity of the design, and the skill level of the installer. On average, it can take anywhere from a few days to a couple of weeks to complete the installation process. Factors such as removing old cabinets, prepping the space, assembling new cabinets, and making adjustments all contribute to the timeline. To learn more about the installation process, visit: How Long Does It Take to Install Kitchen Cabinets.
Frequently Asked Questions Of How Long Does It Take To Paint Kitchen Cabinets
How Can I Estimate The Time Needed?
To estimate the time to paint kitchen cabinets, consider factors such as cabinet size, preparation, and drying time. On average, it can take 3-5 days for a complete cabinet painting project.
What Tools Do I Need For Painting Cabinets?
You will need tools like brushes, rollers, sandpaper, primer, paint, and a drop cloth for painting kitchen cabinets. Proper tools ensure a smoother finish and efficient painting process.
How Do I Prepare Cabinets For Painting?
Prepare cabinets by cleaning surfaces, removing hardware, and sanding to create a smooth base for paint. Use a deglosser to remove any existing finishes before applying primer for better adhesion.
Conclusion
The time it takes to paint kitchen cabinets varies depending on factors like size, preparation, and drying time. By following the right process and using the appropriate materials, you can achieve a professional finish. With careful planning and patience, the transformation of your kitchen can be a rewarding and satisfying experience.